 US,
US,  UK
UK  Canada
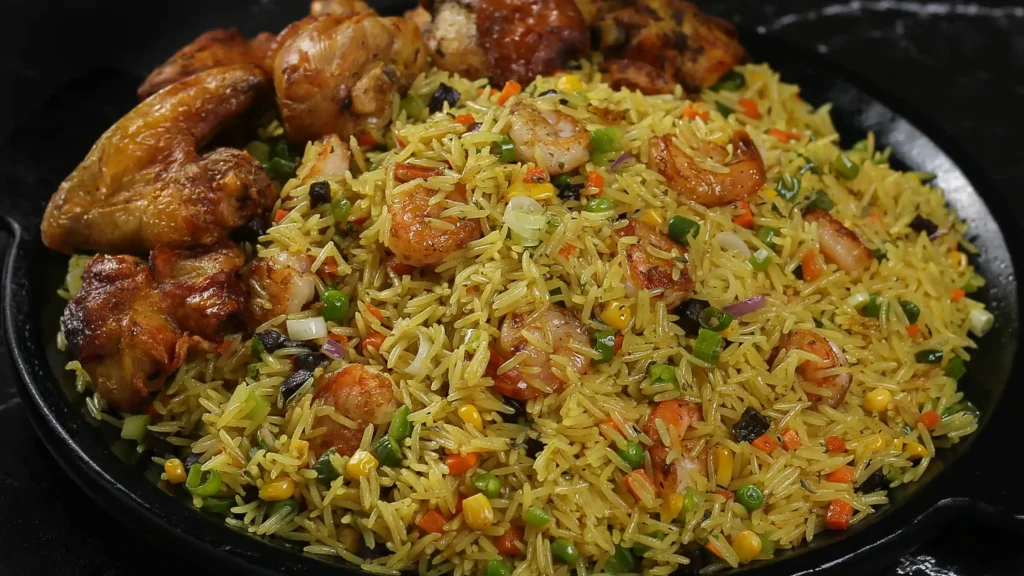
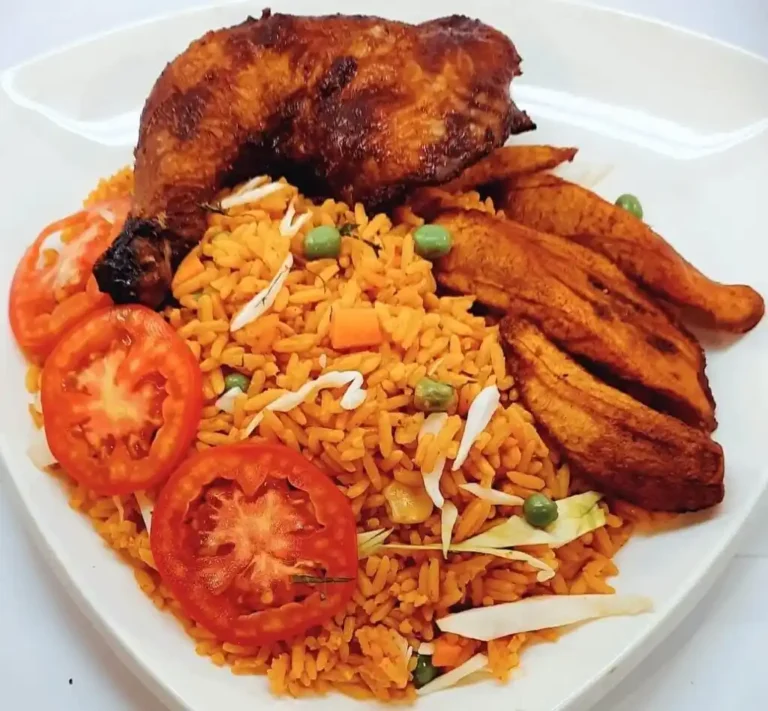
Nigerian fried rice is the dish that shows up right next to jollof rice at every party — same table, completely different flavor. Where jollof is deep red and cooked in one pot of sauce, fried rice is lighter, colorful, and curry-forward, with the rice cooked separately before everything comes together.
What Is Nigerian Fried Rice?
Nigerian fried rice is a stir-fried rice dish seasoned with curry powder and mixed with finely diced vegetables — typically carrots, green beans, sweet corn, and bell peppers — along with liver, shrimp, or another protein. Unlike Chinese-style fried rice, it doesn’t use soy sauce as its base; the flavor comes from curry powder, thyme, and a well-seasoned stock the rice is cooked in before it’s stir-fried. It’s a party-table staple, almost always served alongside jollof rice and grilled chicken.
Nigerian Fried Rice Ingredients
Serves 6–8
- 4 cups long-grain rice (parboiled works well, same as jollof rice)
- 3 cups chicken or beef stock
- 2 carrots, finely diced
- 1 cup green beans, chopped
- 1 cup sweet corn kernels
- 1 red bell pepper, diced
- 1 green bell pepper, diced
- 1/2 lb liver, shrimp, or your protein of choice, diced or chopped
- 1 onion, chopped
- 1/3 cup vegetable oil
- 2 tbsp curry powder
- 1 tsp dried thyme
- 2 seasoning cubes
- Salt and pepper to taste
How to make THE BEST NIGERIAN FRIED RICE | Mind blowing Fried rice recipe
How to Make Nigerian Fried Rice
- Cook the rice in stock. Rinse the rice, then cook it in the chicken or beef stock (rather than plain water) until just tender — the rice should be cooked through but still firm, not mushy, since it gets stir-fried afterward. Spread the cooked rice out on a tray to cool and dry slightly; this step matters more than people expect for avoiding clumpy, sticky fried rice.
- Prep the vegetables. Dice the carrots, green beans, corn, and bell peppers into small, even pieces. Uniform size matters here, since everything cooks together quickly in the next step.
- Cook the protein. In a large pan or wok, heat a little oil and cook the liver, shrimp, or other protein until just done. Set aside.
- Sauté the vegetables. In the same pan, heat the remaining oil and sauté the onion until fragrant. Add the carrots and green beans first, since they take slightly longer to cook, followed shortly by the corn and bell peppers.
- Season. Sprinkle in the curry powder and thyme, stirring to coat the vegetables evenly and toast the spices slightly, which brings out more of their flavor than adding them straight into liquid.
- Add the rice. Add the cooled, cooked rice to the pan and stir-fry everything together, breaking up any clumps as you go. Crumble in the seasoning cubes and adjust salt and pepper to taste.
- Return the protein. Stir the cooked liver, shrimp, or protein back in during the final couple of minutes, just to reheat and combine.
- Serve hot, typically alongside jollof rice, grilled or fried chicken, and coleslaw or salad.
Getting the Rice Texture Right
This is the single biggest technical challenge in the whole recipe, and it’s worth understanding why:
- Cook the rice slightly underdone, not fully soft, since it continues cooking during the stir-fry stage. Aim for rice that still has a very slight bite to it when you first drain it.
- Spread it out to cool and dry rather than leaving it in a covered pot — trapped steam is what turns fried rice gummy. A large tray or baking sheet works well for this, giving the rice maximum surface area to release moisture.
- Use parboiled or basmati rice, which hold their shape better than softer rice varieties like jasmine, which tends to clump more readily once stir-fried.
- Don’t overcrowd the pan during stir-frying. Too much rice at once steams instead of frying, which prevents the slightly dry, separate-grain texture you’re after — work in batches if you’re making a large quantity, rather than trying to fit everything in one pan at once.
Nigerian Fried Rice vs. Jollof Rice
These two get served together so often that people sometimes assume they’re variations of the same dish — they’re not:
- Jollof rice is cooked directly in a tomato-pepper sauce, absorbing the color and flavor as it cooks in one pot.
- Nigerian fried rice is cooked separately in stock, then stir-fried with curry powder, vegetables, and protein — no tomato base at all.
Serving both together isn’t redundant; they offer genuinely different flavors and textures on the same plate, which is exactly why they’re paired so often at parties.
Making Nigerian Fried Rice in the Diaspora vs. Back Home
- Curry powder is easy to find everywhere, sold at virtually any regular supermarket in the US, UK, and Canada — one of the more accessible spice requirements on this site.
- Frozen mixed vegetables are a legitimate shortcut if you don’t want to dice everything individually — pre-diced carrots, corn, and green beans work fine and save real time on a busy day.
- Liver is the ingredient most likely to need a specific grocery trip. If it’s not available or not your preference, shrimp or diced chicken are both widely used, easy-to-find substitutes that work just as well.
Where Does Nigerian Fried Rice Come From?
Nigerian fried rice draws on both local Nigerian ingredients and outside culinary influence — the curry powder base in particular reflects British colonial-era trade and spice availability, adapted with distinctly Nigerian technique and vegetable choices over time. It’s become a fixture at Nigerian celebrations specifically because of how well it holds up served at room temperature in large batches, making it practical for weddings and parties where food sits out for hours, unlike dishes that need to be served immediately.
How to Store Nigerian Fried Rice
Nigerian fried rice keeps well in the refrigerator for 3–4 days in an airtight container, and freezes reasonably well for up to 2 months, though the vegetables soften somewhat after freezing. Reheat in a pan with a small splash of water or oil rather than a microwave alone, which helps restore some of the original texture rather than leaving it dry.